Difference between revisions of "What do I need"
m (→Basic Car-System-Modell to DC-Car) |
m (→Basic Car-System-Modell to DC-Car) |
||
| Line 5: | Line 5: | ||
=Basic Car-System-Modell to DC-Car= | =Basic Car-System-Modell to DC-Car= | ||
'''Beginner'''<br> | '''Beginner'''<br> | ||
| − | It is not | + | It is not possible to provide an unambiguous conversion method due to the large variety of vehicles. <br> |
| − | + | The conversion consists of two parts: <br> | |
| − | The | + | 1. The mechanical conversion (to make a stand model rolling) <br> |
| − | + | 2. Digitizing (applying lighting and sensors and installing the decoder) <br> | |
<br> | <br> | ||
| − | '' 'If you want to solder | + | The nice thingh of the DC-Car System is that it is based on the Faller Car system and that it is compatible with this. <br> |
| − | The | + | This also makes it relatively easy to built the system into a Faller Car vehicles. <br> |
| − | + | We recommend starters therefore to choose a large Faller Car vehicle such as a truck or bus for their first conversion and thus gain first experiences. <br> | |
| − | * IR-FTR-Kab Photo | + | At fairs and sites for 2nd hand stuff you will find sometimes these models friendly priced at. <br> |
| − | * IR | + | Therefore, do not take your best model to start with, just start simple. <br> |
| − | * | + | By choosing Faller Car vehicle you bypass the time-consuming mechanical conversion of a stand model as mentioned in point 1 <br> |
| − | * Update | + | <br> |
| − | * Red, yellow | + | '' 'To digitize there are basically three options:' '' <br> |
| − | + | 1. Conversion with loose components <br> | |
| + | 2. Conversion with wired components <br> | ||
| + | 3. Conversion with wired components with pre-mounted LEDs and sensors <br> | ||
| + | <br> | ||
| + | The simplest method is to just install the anti-collision system and omit the other lights. <br> | ||
| + | But the lighting features make the vehicles just so realistic. The lighting works by external control via IR emitters, or by installing the optional light sensor or continuous activation in the CVs of the decoder! <br> | ||
| + | <br> | ||
| + | '' 'If you yourself want to solder the wires to the LEDs or sensors, you can also order them wired' '<br> | ||
| + | The LEDs and sensors each have their own color wire which leads to less work looking at converting <br> | ||
| + | The colors are standardized and chosen so that they lead to less problems if they are accidentally mixed up. <br> | ||
| + | * IR-FTR-Kab Photo transistors with wires for the front <br> | ||
| + | * IR LED Kab Infrared LEDs with wires for the rear <br> | ||
| + | * Lighting bar with wires and IR LEDs for the rear <br> | ||
| + | * Update Connector with wires <br> | ||
| + | * Red, yellow and white LEDs with wires <br> | ||
==Truck, Bus, Sprinter== | ==Truck, Bus, Sprinter== | ||
Umbau eines Faller-Car-System LKW, Bus oder Sprinter zum DC-Car. Nicht für PKW von Faller® geeignet!<br> | Umbau eines Faller-Car-System LKW, Bus oder Sprinter zum DC-Car. Nicht für PKW von Faller® geeignet!<br> | ||
Revision as of 13:18, 27 April 2016
Contents
Basic Car-System-Modell to DC-Car
Beginner
It is not possible to provide an unambiguous conversion method due to the large variety of vehicles.
The conversion consists of two parts:
1. The mechanical conversion (to make a stand model rolling)
2. Digitizing (applying lighting and sensors and installing the decoder)
The nice thingh of the DC-Car System is that it is based on the Faller Car system and that it is compatible with this.
This also makes it relatively easy to built the system into a Faller Car vehicles.
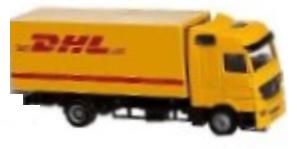
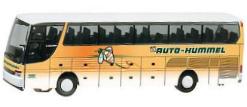
We recommend starters therefore to choose a large Faller Car vehicle such as a truck or bus for their first conversion and thus gain first experiences.
At fairs and sites for 2nd hand stuff you will find sometimes these models friendly priced at.
Therefore, do not take your best model to start with, just start simple.
By choosing Faller Car vehicle you bypass the time-consuming mechanical conversion of a stand model as mentioned in point 1
'To digitize there are basically three options:'
1. Conversion with loose components
2. Conversion with wired components
3. Conversion with wired components with pre-mounted LEDs and sensors
The simplest method is to just install the anti-collision system and omit the other lights.
But the lighting features make the vehicles just so realistic. The lighting works by external control via IR emitters, or by installing the optional light sensor or continuous activation in the CVs of the decoder!
'If you yourself want to solder the wires to the LEDs or sensors, you can also order them wired' '
The LEDs and sensors each have their own color wire which leads to less work looking at converting
The colors are standardized and chosen so that they lead to less problems if they are accidentally mixed up.
- IR-FTR-Kab Photo transistors with wires for the front
- IR LED Kab Infrared LEDs with wires for the rear
- Lighting bar with wires and IR LEDs for the rear
- Update Connector with wires
- Red, yellow and white LEDs with wires
Truck, Bus, Sprinter
Umbau eines Faller-Car-System LKW, Bus oder Sprinter zum DC-Car. Nicht für PKW von Faller® geeignet!
Fahrzeugdecoder DC07-SI für 1,2 - 2,4 Volt.
Benötigt wird normaler Weise ein IR-Set:
Sensoren für vorn Strahler für hinten
- 2 IR-FTR Fototransistoren ohne Kabel und 3 IR-LED ohne Kabel
Beleuchtung
- 2 weiße LEDs für Scheinwerfer (rot / schwarz)
- 4 gelbe LEDs für Blinker vorne und hinten (rot / silber)
- 4 rote LEDs für Bremslicht und Rücklicht (rot / blau)
Alternativ hierzu:
- 2 gelbe LEDs für Blinker vorne
- RTL-IR Rückleuchtenträger mit Blinker, Rücklicht, Bremslicht und IR-LED auf einer Platine
Weiteres zu empfehlendes Material:
- 1x8-polige Updatebuchse
- PVC-Kabel rot, schwarz, blau und gelb
- Kupferlackdraht in 5- oder 7 Farben
PKW von Faller® zu DC-Car
Umbau eines Faller-Car-System PKW zum DC-Car. Nicht jeder PKW von Faller® ist geeignet!
Fahrzeugdecoder DC08-I für 3,6 Volt.
Benötigt wird normaler Weise ein IR-Set:
Sensoren für vorn und Strahler für hinten
- 2 IR-FTR Fototransistoren ohne Kabel und 3 IR-LED ohne Kabel
Beleuchtung
- 2 weiße LEDs für Scheinwerfer
- 4 gelbe LEDs für Blinker vorne und hinten
- 2 rote LEDs für Bremslicht/Rücklicht
weiteres Zubehör
- 1 LiPo-Akku 90 mAh
- 1 Ladegerät für Lipo-Akku 90 mA LAdestrom
- 2x4-polige Updatebuchse
- Kupferlackdraht in 5- oder 7 Farben
- PVC-Kabel rot, schwarz, blau und gelb
DC07-SI-Set
Dieser Einsteigerset beinhaltet das Nötigste an Leuchten für ein Fahrzeug.
Hierbei muss man die Drähte selber am Decoder anlöten!
Extra bestellen: Zum ersten Fahrzeug ist zu empfehlen:
- 4 Grundkabel aus Litze rot, blau, schwarz, gelb
- Kupferlackdraht von DC-Car in den 7 Farben rot, schwarz, blau, grün, silber, orange, violett
Hauptanschluss
|
für hinten
|
für vorn
|
Vorbedrahtete Sets
Es gibt fertig gelötete Sets, für diejenigen die nicht am Decoder löten möchten:
Über die Update Buchse wird der CV-Programmer angeschlossen.
Über ein kostenloses PC-Programm kann das Verhalten des Decoders eingestellt oder verändert werden.
Mit einer Digitalzentrale wie Intellibox, Multimaus o.a. kann man die Funktionen (CV) ebenfalls verändern.
Hierzu ist ein Progset bestehend aus einer IR-LED, einer LED, einer Diode und einem Widerstand nötig.
DC07-SI-PVC-F
Nur die Grundkabel sind angebracht.
Hauptanschluss
|
für hinten
|
für vorn
|
DC07-SI-BUS-F
Für einen Bus mit durchsichtigen Kunststoffleuchten ist alles vorgefertigt erhältlich.
Hauptanschluss
|
für hinten
|
für vorn
|
DC07-SI-LKW-F
Für einen LKW ohne Anhänger.
Hauptanschluss
|
für hinten
|
für vorn
|
Bedienung
Für alle Decoder gilt: Die Beleuchtung funktioniert nur durch eine Bedienung.
Diese kann bedient werden durch:
- Remotecontrol (Lieferzeit nicht unter 1 Monat nach Bestellungseingang)
- Fu SW Funktionsbaustein Materialsatz oder wird für sie im Auftrag gelötet
- Progset In Verbindung mit einer Digital-Zentrale im DCC28- Format
Mit Remotereceiver (Remotereceiver) ausgerüstete Modelle und entsprechende Einstellung des Decoders (CV21) ist die Bedienung über 5 Meter möglich.
- DC-Car-PC-Sender (5 IR-LED liegen bei für ca. 3 qm Fläche)
Mit USB-Anschluss. Die Software oder eigene Programme können zum Bedienen der Fahrzeuge benutzt werden.
- DC-Car-Booster (5 IR-LED liegen bei für ca. 3 qm Fläche)
Mit einer Digitalzentrale verbunden ist die Bedienung wie bei einer Lok möglich.
Wenn die Zentrale mit einem PC bedient wird, so ist die Steuerung der Autos per Mausklick oder automatisch möglich.
Sonderfälle
Fahrzeugdecoder mit Einschränkungen
Fahrzeugdecodertypen
- DC07 für Standfahrzeuge ohne Bedienung 5 Volt
- DC07-I für Fahrzeuge mit Bedienung 3-5 Volt
- DC08-I Fahrzeugdecoder mit weniger Funktionen 3,6 - 5 Volt
Anhaenger-Decoder
DC05-A in Verbindung mit DC05/7-SI zu benutzen
DC05-S-A nur in Verbindung mit DC05/7-SI und DC05/7-I zu benutzen
Hier geht es weiteres zum Anhaenger-Decoder
Zusammenstellung für N Modelle
Da in Modellen des Maßstabs N kaum Platz ist, muss man Einschränkungen hinnehmen.
- Nur den DC07-SI. Die vorbedrahteten Set´s sind wegen der lange Drähte nicht zu empfehlen.
Sie müssen entsprechende der Platzverhältnisse bei jedem Modell angepasst werden.
- Dieser Decoder arbeitet ab 1,2 Volt. Wenn man den serienmäßigen Akku (NiMH) von Faller® ersetzt kann man Platz für den Decoder gewinnen.
Allerdings brauchen diese modernen Akku´s ein besseres Ladegerät oder einen Laderregler hinter dem Faller®-Lader.
Alternative:
- DC07-I oder DC08-I Diese Decoder sind ein wenig kleiner, arbeiten aber nur mit 3,6 Volt und erfordern somit einen LiPO-Akku.
- Diese kleinen Lipo-Akkus müssen mit einem spezielen Lipo-Lader oder Laderegler geladen werden.
Es darf keinesfalls das einfache Fallerladegerät benutzt werden. Brandgefahr!
Combination with Remotereceiver
DC07-SI-PC
Decoder und LCIR zum selber anlöten. Voreingestellt CV21=24 für den Betrieb mt einem PC-Sender.
Der PC-Sender-USB braucht ein Programm zur Bedienung.
Auf der beiliegenden CD ist die Demo-Version von Windigipet enthalten.
Es liegen 5 IR-Strahler für den ersten Strang bei.
DC07-SI-Booster
Decoder und LCIR zum selber anlöten. Voreingestellt CV21=4 für den Betrieb mit einem DC-Car-Booster.
Der Booster braucht eine Digitalcentrale mit DCC28-Format.
Es liegen 5 IR-Strahler für den ersten Strang bei.
charger
Es gibt verschiedene Möglichkeiten die Akkus aufzuladen.
- einfache Lader (genau auf Ladezeiten beachten)
- automatische Lader (richtig einstellen)
- Fastcharger (verringern die Lebensdauer der Akkus)
- Permanentcharger (halten die Akku auch in der Sommerpause voll)
siehe charger
Questions
Sie wissen nicht, ob sie das richtige bestellen?
Kein Problem
Einfach bei der Bestellung im Textfeld nachfragen.
Bei der Erstellung der Vorabrechnung werden grobe Fehler auffallen oder doppeltes Material hinterfragt.
Lieferzeiten
Je nach Zusammnstellung ergeben sich unterschiedliche Lieferzeiten.
Die einfachen Decoder zum Selberlöten sind in 1 Woche verfügbar.
Decoder-Sets mit bedrahtet LED werden erst mit dem Bestellungseingang gefertigt. Die Vorabrechnung erfolgt erst, wenn ich einen voraussichtlichen Liefertermin nennen kann. Im Normalfall ohne Feiertage oder Messen 21 Tage
Entry into DC Car
Hier werden die Grundlagen vermittelt.
Auf diesen Seiten der WIKI wird der Entry into DC Car erläutert.
Wir bieten auch Seminare und Workshops an.
Siehe Events_2015


